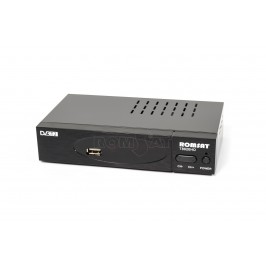
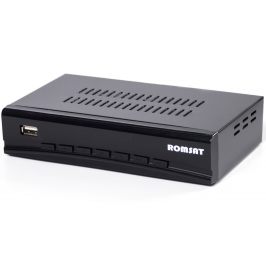
Instructions for connecting the T2 tuner to the TV
How to connect the T2 tuner to the TV: detailed instructions
-
Prepare the tuner and TV
- Unplug the TV and tuner to avoid damage.
- Check that you have all the necessary cables: antenna cable, HDMI or RCA cables to connect to the TV.
-
Connect the antenna
- Plug the antenna cable into the "ANT IN" or "RF IN" connector on the T2 tuner. This will ensure that your TV antenna receives a signal.
-
Connect the tuner to the TV
- HDMI connection: If your TV has an HDMI connector, connect one end of the HDMI cable to the tuner (HDMI OUT connector) and the other to the HDMI input of the TV.
- RCA connection (for older TVs): Connect the RCA cables (yellow for video, red and white for audio) to the corresponding colored connectors on the tuner and TV.
-
Turn on the tuner and TV
- Plug the tuner into an outlet and turn on the TV.
- On the TV, select the signal source (HDMI or AV, depending on the type of connection).
-
Tuner settings
- Tuners purchased from us come already configured and do not require reconfiguration.
- If rescanning of channels is required (check with the manager), press the MENU button on the remote control.
- Select the option of channel scanning or channel tuning depending on the tuner model.
- Start automatic channel scan. The tuner will find all available digital channels.
-
Save settings
- When the scan is complete, save the found channels.
- Now you can switch channels and use the tuner functions.
-
Final Setup
- If necessary, adjust the picture quality, screen format and sound through the tuner menu.
Now your T2 tuner is connected to your TV and you can enjoy watching digital TV channels!
More about switching AV or HDMI to connect T2 tuner to TV
After you have connected the tuner to the TV via HDMI or RCA (AV) cables, you need to set the TV to the correct input to start receiving the signal from the tuner. Here is the detailed process of switching to the appropriate input:
Steps to switch AV or HDMI on TV:
-
Turn on the TV:
- After connecting the tuner to the TV using cables, turn on the TV using the remote control or the button on the case.
-
Find the button to switch the signal source:
- On the TV remote control, find the button that is responsible for switching the signal source. It can be named Source, Input, AV, HDMI, or have an arrow icon in a square ⮕☐.
-
Press the signal source selection button:
- Press the Source or Input button on the remote. A menu will appear on the screen, where all available inputs (signal sources) will be displayed.
- These can be options such as HDMI 1, HDMI 2, AV1, AV2, Component, or even TV (analog input).
-
Choose the correct login:
- If you connected the tuner via an HDMI cable, select the appropriate HDMI input (eg HDMI 1 or HDMI 2, depending on which connector you connected to tuner).
- If you are using RCA (AV) cables (yellow for video and red/white for audio), select the appropriate AV or Composite input (sometimes this input can also be called Video).
- For older TVs with component inputs, select Component or AV if cables are connected via these connectors.
-
Switch between sources:
- After selecting the correct input (HDMI or AV), the TV should start showing the T2 tuner signal screen. If there is no signal, check whether you have connected the cables correctly and try to select a different input on the TV.
-
Save your selection:
- Some TVs automatically save the selected input after switching, but on some models you need to press the OK button andfor Enter to confirm the selection.
-
Image and sound settings:
- After switching to the correct input, if there is no picture or sound, please check the cable connections or select another AV/HDMI input. Usually, if everything is connected correctly, an image of one of the channels appears on the screen or the inscription "No signal" if the antenna is not connected.
-
Switch back to TV:
- To return to watching normal TV channels (analogue or other sources), press the Source/Input button again and select TV or another signal source used by your TV.
Additional tips:
- If you do not see a picture after selecting an input, make sure the tuner is turned on and connected to the network.
- For connection via RCA cables (yellow/red/white), make sure the colors of the cables match the colors on the connectors on the TV and tuner.
- If you have multiple HDMI inputs, check the correct input number that the tuner is connected to (eg HDMI 1 or HDMI 2).
Thus, switching AV or HDMI on the TV will allow you to connect and watch channels through the T2 tuner.


